Water!

A couple of days ago, I decided to hop over the fence separating my property from public lands to the west, to go walk to Lassen National Forest, which starts just half a mile down a forest service road. On the way, I planned on checking out a pond that’s located a couple hundred yards from the barbed wire fence. As I approached the fence, though, I heard a whisper. I undid my hood to uncover my ears. There was no mistaking the sound — the sound of trickling water!

I scrambled downhill towards the bottom of the ravine where I knew the sound must emanate from. The whisper turned into the full-on susurration of gushing water.

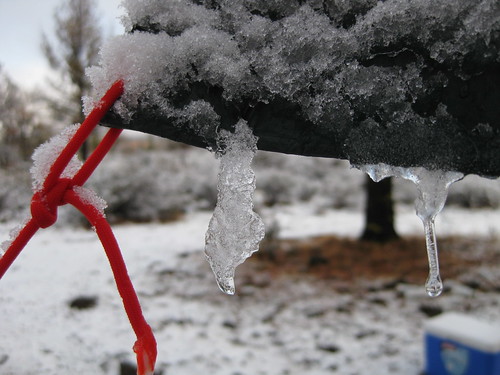
The seasonal stream was running!

Even though I’d always suspected the presence of a seasonal stream there, the sights and sounds stirred palpable excitement. Water! Gallons and gallons of water, gushing right through my property! The sudden appearance of this body of water made it seem that much more magical.

Though, in reality, the stream’s appearance could hardly be attributed to magic. In fact, the pond that I had been planning on visiting sits upstream from this creek, and is the very reason I suddenly started receiving water. The pond is actually the result of a large earthen berm that blocks that stream. When the water level rises high enough, the dam is flanked, releasing any additional water downstream towards my property.

The timing of its release is also unsurprising. It had snowed almost 2 feet over the past few weeks, but recent warm weather accompanied by rain had caused all that snow to suddenly start melting and rush downhill. When the pond filled up, the overflow started trickling through my property. Once all the snow is gone, probably in the next month or so, the stream will also stop running. But during that short window, snow melt from hundreds of acres of land will rush through that narrow gully on my land.

Exiting my property to the north, the creek eventually joins other tiny streams heading towards Pit River, which meanders west across the mountains to empty into Lake Shasta, to then continue south down the Sacramento River, eventually spilling into the Pacific Ocean where it would evaporate, condense into clouds that get blown back east, and fall as rain and snow on these same mountains to repeat the cycle.

On the way, some of it may be diverted to irrigate the rice fields and orchards in the Central Valley. So the next time you eat California-grown rice, or olives, or almonds, or perhaps fruits, you may be eating a tiny bit of that snow-melt I saw flowing through Serenity Valley.

Living here, I’ve gained a much deeper appreciation for water. Water is life. People talk about the “gold standard”, but I think there should be a “water standard.” Water is what makes life possible. No water, no life.

And until recently, I mostly thought of Serenity Valley as an inhospitably dry place. Indeed, from late Spring until mid-Autumn, there’s hardly any rain. In the summer, it’s typical for there to be zero precipitation for months. Last year, I had to haul water in to irrigate my tiny garden, and even that wasn’t enough.

But, lo! When I saw all that water gushing through my property, I felt like I’d struck gold. Nay, I felt like I’d struck life. If I can contain even a tiny fraction of the water, life can flourish on Serenity Valley. I can grow a much bigger garden, and even grow fruit trees. I can raise livestock. I may even be able to raise fish! It’s so dry here in the summer that things don’t even compost very well, but water changes that too. The soil isn’t great, but, as long as there’s water, I could build it up.

When I bought this land, I hadn’t really considered the possibility of homesteading here. Now that I’ve been contemplating that option, I was starting to doubt the suitability of this land for sustaining life. That changed the instant I heard that stream. Sure, there are much easier places to homestead, where growing seasons are longer, or summers aren’t so dry, or the soil is better. But with all that water, I think it’s at least theoretically possible to turn this land into a productive little farm. It wouldn’t be easy. It’d be an uphill battle all the way. But it just might be possible, and that’s pretty darn exciting.

As new possibilities blossomed in my imagination, I continued with my walk to Lassen National Forest as planned. I was tempted to spend more time around the new creek, but reasoned that it would still be running for at least a week or two.

***

The next day, having slept off my aquatic euphoria, I turned to more practical considerations. I started by walking the entire length of the creek, following it all the way through my property and out. The goal was to get an idea of the creek’s path, and to gain a better grasp of the terrain surrounding the stream. For the water to be usable during the dry season I would need to collect it, either with a dam of my own, or by diverting the water to a cistern. My hope was to spot potential sites for one or the other.

After entering my property from the west, a few hundred yards north of the south-west corner, the creek rushes down the steep ravine that I mentioned before, at a east-northeasterly orientation. The ravine eventually opens up to a bigger valley, the one I think of as actual Serenity Valley, which slopes gently down almost due north. The creek gradually wanders to the east, flowing out my property lines, then continues north parallel to my eastern border, eventually pooling in a flat area near the paved road, before disappearing into a large duct under the road just yards from the peg marking my north-eastern corner.

As I walked the length of the creek, it became obvious that damming a considerable quantity of water would quickly become a monstrous logistical and engineering feat, probably beyond my budget or skills. A more practical and practicable solution seemed to be to set up a small dam, maybe just a foot or two high in a natural bottleneck, to raise the water level just enough to make water collection easier. From there, some of the flow could be diverted by a series of pipes to a cistern located in a reasonably flat and clear area about 100-150 yards away. The terrain would allow the cistern to be located at a slightly lower elevation, and could be fed by gravity.

But, is there enough water?

As I observed the creek, I tried to make a rough estimate of its flow rate. To do so, I found a natural funnel where the stream was constrained between some large boulders, then imagined the jet of water being further narrowed, and pictured the water filling a gallon jug. It seemed like there was enough water flowing to fill a gallon jug in about a second. To be conservative, let’s call it half a gallon a second. That’s 30 gallons per minute, 1800 gallons per hour, or 43,200 gallons per day. If the creek were to run for 20 days, a total 864,000 gallons would flow through. (Incidentally, this method of approximation is called a Fermi estimate and is often employed by scientists and engineers to make ballpark estimates that often yield results in the right order of magnitude.)

So, even if I over-estimated or under-estimated by 100%, we’re looking at hundreds of thousands of gallons on the lower end, and well over a million on the high-end. It seems that diverting 10-20,000 gallons would hardly do any harm, yet would provide me with enough water to irrigate a large garden, raise a couple of heads of cattle, with maybe even enough left for a small fish pond.

But, would that be legal?

My natural inclination towards such questions would be to ask, “Does it harm anyone?” If not, who cares? After all, diverting 0.5-5% of a tiny seasonal creek seems pretty harmless. Being a seasonal creek that only exists for a few weeks a year, there’s no native fish or other wildlife I need to worry about. I’m not dumping toxins downstream. So, it seemed like it’d be something so harmless as to not even warrant regulation in the first place.

But then, this is California. And this is water we’re talking about. I decided to begrudgingly research the legal ramifications, half expecting to find that what I wanted to do would be bound tightly in red tape.

As it turns out, California laws regarding Water Rights apparently include an exception for crazy (or reasonable) people like me. On the FAQ page of the California Water Board’s website, I found the following:

There is one exception to the requirement that you have a water right. You do not need a water right if you take and use a small amount of water only for domestic purposes or use a small amount of water for commercial livestock watering purposes. However, you are required to register your use with the Division of Water Rights, notify the California Department of Fish and Game, and agree to follow conditions the Department of Fish and Game may set to protect fish and wildlife. The maximum use allowed under such a registration is 4,500 gallons per day for immediate use or 10 acre-feet per year for storage in a pond or reservoir.

Furthermore, “domestic use” is defined as:

… indoor household uses, watering of non-commercial stock used for the household, and irrigation of one-half acre or less of household land, such as a garden.

So, as it turns out, what I want to do is legal, and only requires registration. Though, the registration form asks for the estimated water usage in acre-feet, and since one acre-foot is 325,851 gallons, 10,000 gallons would be about 0.03 acre-feet, or a mere 0.3% of the 10 acre-feet that is allowed under this provision. To be honest, I feel like making a state worker (and someone from the DFG) process my registration for such a minuscule amount of water would cost the state of California more than it’s really worth…

One remaining open question is the cistern. My first thought was, of course, a DIY approach. A 10,000 gallon cistern could measure 15x15ft filled to a depth of 6ft (7.48 gallons fit in 1 cubic foot), and a 15x15x7ft box with 6″ walls would require about 41 yards of cement at a cost of probably $5000-7000 (though there’s also the question of how I’d get a cement truck out there). Even if reinforced with rebar, 6″ walls may not be sufficient, so that may be a low estimate. After doing some research, it seems above-ground plastic tanks may actually be more cost effective. They seem to be priced around $0.50/gallon (+shipping) or lower, and come in varying shapes and sizes so I could start with a small tank and add more. Being fully enclosed, evaporation wouldn’t be an issue either, and the bigger ones have man-holes for cleaning (the water is pretty murky, so I suspect there’ll be a fair amount of sedimentation).

Another related idea I had was to set up a micro-hydroelectric generator to run a pump, and lift the water to a higher elevation that way. About the only good that would do is to open up more possible locations for the cistern. But using the creek to generate power wouldn’t be practical for much else, since it probably only runs for a few weeks out of the year, and the creek is about 300 yards from my camp. Re-capturing energy when water is released from the cistern might be feasible, though it’s just as likely that water from the cistern would need to eventually be pumped higher since most likely locations for gardens are located higher up on my property.

All in all, preliminary indications are promising. If water-flow I’m seeing now is fairly typical, diverting about 10,000 gallons seems both legal and practicable. Tentatively, I may try to setup a small test this summer, and see how it does next spring. I could start with a cistern or tank in the 1000-2500 gallon range, and scale-up if that works out. As they say, Rome wasn’t built in a day, and if Serenity Valley is to see a transformation into Serenity Valley Farm –still a big if, mind you– it’s going to take years, if at all.

Solar Tracker Experiment

Several months ago, when I first posted about my manual two-axis solar tracker, a couple of readers asked whether a tracker really made that big of a difference. I had a theoretical answer based on simple trigonometry and the amount of light that falls on a surface relative to its orientation to the sun. Specifically, the amount of direct sunlight that falls on a square surface should be proportional to cosine(θ) x cosine(γ) where θ and γ are the angles between where the panel is pointed and where the sun is, in the x and y axes. By this theory, a panel that is perfectly aligned in one axis, but off by 30 degrees in the other axis would only get about 86.6% as much direct light. (This formula ignores ambient light, which in reality would clearly be present in addition to direct sunlight.) But I had no empirical data to back up my theory… until today.

On a sunny day like today, I’d re-orient my 100W solar panel 2 to 3 times in the course of the day. I usually point the panel to the east before going to bed so that it’ll catch the morning rays, and I’ll move it to point due-south later in the morning. In the afternoon, I might move it one or two times as well. The general idea is to keep the panel pointed to within about 20 degrees of the sun, since that should give me over 94% of available light at all times.

Today, when I went to re-orient the panel a little after 3pm, I decided to get a couple of actual readings. I first checked the voltage of the whole system (charge controllers hooked up to battery array), and got 13.3 Volts. I then measured the current between the charge controller and battery array, with the solar panel in the noon position, and also in its optimal position at the time, which is about 45 degrees from the noon position. With the panel in the “noon position”, I got 3.85Amps, or 51.2 Watts. I then moved it to the 3pm position, and got 5.55Amps, or 73.82 Watts.

The verdict, I might say, is that yes, the tracker makes a significant difference. If the panel had been fixed pointing due south, by 3pm I would only be getting less than 70% of the power that I could be getting, and that number would rapidly diminish as the sun continued moving away. This would also be the case in the morning, when I would get significantly less power than is available for the first few hours of sunlight. And, as it turns out, the numbers fit my theoretical model fairly closely, since according to my theory, my panel should be outputting 70.07% of its maximum when pointed 45 degrees away, while the actual numbers I got today were 69.37% (also, the angular difference was approximate, though, in theory, the sun should move by 45 degrees between noon and 3pm).

One thing to note, however, is that these results were obtained with my monocrystalline panel, which work best in direct sunlight. Thin-film panels, including amorhpous silicone panels, supposedly get more power from ambient light, so they may be less sensitive to orientation, though this is another hypothesis I’ll need to test with my 45Watt amorphous panels sometime.

Another question I got about the tracker was the effectiveness of the “manual” nature of the tracker. Wouldn’t an automatic tracker that constantly aligned the panel with the sun be more effective? Well, yes. But, to get 90% of available energy, the panel can be off by as much as 25 degrees in one axis (arccosine(0.9)). Or, at any given time, if I point the tracker 25 degrees ahead of where the sun actually is, the sun could move through a 50 degree arc and I would still be getting over 90% the whole time. Since it takes the sun over 3 hours to arc through 50 degrees, even manually moving a tracker every 3 hours will ensure that my panel gets 90-100% of available light at all times. So, an automatic tracker with all its complexity only gets maybe 5% more power than a manual tracker that’s re-oriented every 3 hours.

Food for a month

I’m down to my last few days before starting Project 31. I’ll be going on what will likely be my last supply run on Monday. I’d originally planned on “starting” Project 31 three days before the official Day Zero, so that I have a few days during which I could still leave if I think of anything missing. But, if current weather forecasts are accurate, I may be snowed in after Monday, so whatever I get on that run might end up being all I’ll have for a month.

Fortunately, I’ve got all my gear, so I’m down to just picking up a few odds and ends at the hardware store, then going on a big grocery trip to buy a month’s worth of food. This is easier said than done, as I’ve never planned a grocery list to last me a month. In fact, I don’t really even plan a week at a time, because I know I can go to town if I need more (though, generally, I buy enough fresh provisions to last me 5-7 days, and have weeks’ worth of non-perishables as backup).

The other limitation is that I’m not using my fridge/freezer, which means I need to buy food that won’t spoil in weeks of sub-freezing temperatures (which could be tough on vegetables), or above-freezing temperatures (which could limit the shelf-life of meats). Stocking up on non-perishable foods would be easy, but I don’t want to eat out of cans everyday, and having fresh food and diverse options is pretty important to me from a quality of life perspective. So part of the exercise is anticipating the kinds of foods I might crave, and to ensure I have the ingredients to cook them, and to make sure the ingredients last me as long into my stay as possible.

Obviously, there are trade-offs there. For example, in addition to fresh meat, which may not last longer than 2 weeks, I’ll have salted and cured meats that will last a month if kept cool (and I ignore “best before” dates). Instead of my favorite leafy vegetables, I might add root vegetables that have a better chance of surviving freezing temperatures without going bad. Instead of fresh milk, I’ll have canned milk and dry milk. And so on and so forth. There are some things that simply won’t last past the first week or two, and that’s ok too. At least if I can have, say, yogurt during week two, I’d only be without it for a couple of weeks thereafter. In some cases, it’s hard to guess what the shelf life would be (as advertised shelf lives are all super conservative), so finding out how long things actually last would be an interesting experiment in itself.

So, with all that said, here’s my list so far:

Grains/carbs
10lb bag of rice, 3 loaves of bread, 80-100 tortillas, one bag of bagels

Fresh Vegetables
4lb carrots, mushrooms, 2lb zucchini, kabocha squash, 5lb onions, 5-10lb potatoes, 3 bags mixed “southern greens”, 2 heads garlic, fresh ginger, 2 heads of cabbage, 3 bags brussel sprouts, 3lb beets, 2 tomatoes, 3 avocados, 4 bell peppers, cauliflower

Meats
3-5lb pork, 1-2lb chicken, 1-2lb ground turkey, 2lb sausage, 2lb sandwich meats, 3lb salted pork or bacon, 6 cans of fish, 3 pouches of chicken meat, 36 eggs

Dairy
2 boxes dry milk, 4lb cheese, tub of yogurt, cream cheese, 2lb butter (salted & unsalted)

Dry goods, non-perishables, misc
canned soup, canned chili, ready-to-eat indian food, chef boyardee, canned coconut milk, energy bars, chocolate, peanut butter, jam, honey, maple syrup, flour, sugar, baking soda & powder, yeast, dried fruits, nuts

I’m sure I’ll add more when I’m at the grocery store, so this is kind of a baseline. Ultimately, I’m also not terribly worried because this is mostly a quality of life problem, not one of survival. I’ll have plenty of calories to survive off of — it’s mostly a question of whether I’ll have a high enough quality diet to be reasonably content. I also realize that no list will ever be complete, and that by day 15 or 20, there will be something I’d want that I simply don’t have. And that’s okay too, because the whole point of Project 31 is to discover the things I’m missing. In fact, I’d be pretty happy if by day 15 or 20 what I’m missing most is sushi, and not something actually more critical.

LED Light Bulbs, the numbers

I recently picked up a couple of LED light bulbs that are starting to become more popular in Japan. After comparing a few different options from various major manufacturers, I settled on the “40 Watt” (450 lumen) bulbs made by Panasonic. The main draws for me were the relatively high efficiency (more lumens per watt) compared to other LED bulbs, and the fact that they emit a warmer orange color rather than the harsh bluish light typical in CFLs. Another draw was the fact that these bulbs are rated to last 40000 hours, or about 5x as long as CFL bulbs, which could reduce waste.

On the other hand, at around $30 a pop (2380JPY, to be exact), they’re pretty expensive as far as light bulbs go. Are they worth it? I decided to run some numbers, comparing the LED bulb I got to a traditional incandescent 40w light bulb, as well as “40W”, “60W” and “100W” CFL bulbs. The results are in this spreadsheet below (see the original document on Google Docs).

Notes:

  • klmh – “klmh” stands for “kilo lumen hours”, and can be thought of as the total amount of light emitted, if it were possible to gather light over time and put it in a box. One klmh equals the amount of light emitted by a 1000 lumen lamp over 1 hour, or a 1 lumen lamp over 1000 hours. Technically, a lux is a better unit with which to measure total light emission, but that information wasn’t available (while lumens were) so I used Kilo-Lumen-Hours to compare bulbs of different brightnesses.
  • Power costs – I used $0.15 per kWh. Actual energy costs vary from around $0.10 to $0.20 in the US. See prices for September 2010. Calculating the cost of energy for off-grid systems is much, much harder, and would vary widely from system to system, so that is left as an exercise for another day.
  • Annual usage – To calculate “costs over 5 years”, I assumed an average 5 hours of usage per day, or 9125 total hours of usage.
  • Total costs – The “total cost” calculations combine the amortized cost of the bulb with estimated energy costs (again, at $0.15/kWh).

I tried to compare the bulbs from a wide range of perspectives, and ended up with all sorts of numbers. I’ve highlighted the ones that I think are relatively informative, but, as you can see, some bulbs do better in some comparisons, and do worse in others. In other words, there’s no clear all-around winner.

Efficiency – In terms of efficiency, the “40W” LED bulb (65.22lm/W) was bested only by the “100W” CFL bulb (67.33lm/W). In reality, the LED might perform a little worse, because LED lamps have more directed lighting patterns, so despite what the lumen rating is, the actual total amount emitted may be less than CFL bulbs. As a side note, it was also interesting to see that the efficiency of CFL bulbs improved with increase in wattage. I think this is because fluorescent lights become more efficient the longer they are, and higher wattage CFLs simply have longer tubes.

Cost – If all you care about is having a light bulb –any light bulb regardless of brightness– in a socket, LED is by far the cheapest option. Even though the upfront cost of the bulb is considerably higher than the alternatives, the additional expense is offset by the bulb’s long lifespan and low energy usage.

On the other hand, LED bulbs are relatively dim compared to the brightest CFLs, and if you must have lots of light, CFLs are cheaper for the amount of light you get. This last point is important. Even though a 26W CFL bulb has 1/10 the cost of a 6.9W LED for the same amount of light, the simple fact that it uses more than 3.5 times as much electricity can not be overcome. Having a 26W (“100W”) CFL in that socket will cost you more than twice as much as using a 6.9W (“40W”) LED bulb. But if you must have that much light, it is cheaper to use one “100W” CFL bulb than to use multiple “40W” LED bulbs.

More is more, less is less
Retailers often try to get consumers to buy more stuff by offering lower per-unit costs when purchased in bulk. While buying in bulk may lead to real savings, such deals can also be a pitfall that leads to excessive consumption and spending. The question to ask is, “Do I have to alter my behavior, in order to take advantage of this deal?” If the answer is “yes”, it is best to stay away from bulk purchases. For example, let’s say a grocery store has a deal on ice cream, such that if you buy 2, you get 1 free. The question is “Would I eat more ice cream if I bought 3?” If the answer is “yes” (and let’s be honest now), just buy one, because one is still cheaper than two, in absolute terms. On the other hand, if you’re dealing with something like toilet paper where abundance probably won’t lead to higher consumption, buying in bulk might actually save you money.

The same applies for lighting. If you can get away with less lighting, it will save power and money. Don’t let the illusion of better “value” trick you into consuming more unless that is really what you want, because you will pay more for it. Using one “100W” CFL bulb for 5 hours a day over 5 years will cost an estimated $38.18, while a “40W” LED bulb used for the same duration will only cost $16.29, even when factoring in the cost of the bulbs. Yes, you get less lighting, but you get less for less, while more costs more.

Lighting accounts for 12% of domestic electricity consumption in the US, and I would argue that that makes it a ripe target for reduction. While current trends are towards improving efficiency, Jevon’s paradox warns us that efficiency may in fact increase consumption. If that is true, it seems to me that the true path to reduction is, well, to reduce. That is, rather than merely swapping 60W incandescent bulbs with “60W” CFL bulbs, consider using “40W” bulbs. Instead of having area lighting consisting of 5 or 6 bulbs, consider having 5 or 6 individual lamps located strategically, so that only localized areas that actually need lighting are lit at any given time. Or, for that matter, turn those lights off entirely, and go to bed early. Artificial lighting can interrupt our natural circadian rhythm, leading to sleeping disorders and other maladies. So going to bed early and getting some extra sleep can save your health and the planet. Now that’s what I call a good deal.

The Cost of Convenience

21.42. That’s how many pounds of propane I’ve burned in the last year or so. I know because I’ve kept every single one of the 1.02lb propane canisters I’ve used. I’ve thought about switching to the bigger 20lb tanks, to save money and reduce waste, but the one thing I like about the little canisters is that it helps me internalize how much gas I’m burning.

Internalizing quantities is something we have a hard time with, yet, if we are to have any hopes of reducing emissions, it’s something we’re going to have to get better at. Unfortunately, in modern society, most of our energy consumption is abstracted away from us. When you pump gas into a car, all you see is a number on the screen, and you probably don’t even know how big, physically, your gas tank is. At home, the power and gas meters are conveniently hidden away. So, understandably, it’s difficult for us to even realize how much energy we’re using even in an abstract sense, much less in any tangible way.

I remember one time while I was pumping gas, I tried to visualize the quantity of that volatile liquid I was going to burn, by picturing all the gas being in 1 gallon milk jugs. Then, I pictured 12 of those jugs and imagined lighting it all on fire. In my mind’s eye I saw a giant ball of flame, and thought for a second that blowing up 12 gallons of gasoline might actually be more fun than using it to drive about 300 miles.

A rechargeable AA battery, at 1.2V, might contain about 1.5 Amp-hours, or a theoretical 3.3 Watt-hours of power. In practice, the voltage would drop too low to be usable after a while, so let’s say, generously, that you’d get 2 Watt-hours. An “efficient” CFL bulb might use 13 Watts, so if you left it on, you’d be using enough energy to drain more than 6 rechargeable AA batteries every hour. Fortunately, if you live in the city, all that power gets delivered to you with the flick of a switch. But next time you do, pretend you’re draining an AA battery every 10 minutes, and it might help you remember to turn lights off when you don’t need them.

In any case, I’m trying to reduce propane usage on my property. Right now, I use propane for my cooking stove (at a rate of about 1lb per week), and my lamp, which also doubles as a heater (which burns about 2lb a week). So far, I’ve had two separate offers from readers to buy me a propane shower, but I’ve resisted. Once Hut 2.1 is done, I’d like to switch to electrical lighting (charged by solar, and perhaps also wind), burn wood for heating and some cooking, and only use propane for the kind of cooking that can’t be done on my wood stove.

Some people argue that wood stoves aren’t so “green.” Burning wood can be rather dirty, especially in old stoves that are inefficient and don’t have catalytic converters. This is true. But, I don’t think it’s realistic to treat all wood burning equally. First of all, when you burn fossil fuels (which include “natural” gas and propane, as well as coal), you’re burning carbon that was taken out of the atmosphere millions of years ago, and then re-releasing it into the atmosphere now, when, if left in the ground, it may not have been re-released anytime soon. When you burn wood, you’re releasing carbon that was absorbed in the last hundred years or so. And –here’s the important part– around here, if I don’t burn the dry tinder, it would eventually be burning anyway in the not-too-distant future. This isn’t true everywhere. As far as I know, forest fires aren’t part of the natural ecosystem in rain forests, and so felling and burning those trees artificially adds emissions. But, around here, it is almost a guarantee that, if left to nature, any patch of forest would burn once every hundred years or so. So, when I pick up some dead dried branches from the woods around me and burn it, I am releasing the carbon trapped in it the way it would’ve anyway. Granted, some of it may have eventually rotted away, or otherwise have gotten broken down biologically (via termites, and other organisms), so I may be boosting emissions slightly, but not by much. On the other hand, if I can clear the forest and minimize the risk of uncontrolled natural forest fires, I may help reduce emissions that way, thus balancing my footprint (though, perhaps not, because the way to clear forests is to –surprise surprise!– do controlled burns).

Of course, CO2 is CO2, regardless of whether it comes from burning wood or burning propane. So, arguably, the two may be considered to be comparable. The difference, though, is that propane is so much more convenient, and so much denser in energy, that it’s much easier to burn in excess when compared to wood, which, by virtue of being less energy dense than propane, takes more effort to move, even if you don’t do the chopping and splitting yourself. A 20lb canister of propane contains roughly the same amount of energy as 60 to 80lb of seasoned firewood. But which would you rather move? Which would you be more willing to go buy more of? When less is more (or better), taking the less convenient route can allow us to be more conscious of our consumption habits, and in turn, moderate such behaviors. If I rely on wood for heat, I’ll need to exert more effort into gathering fuel than if I burned propane. So, I’ll naturally want to burn less of it, and therefore reduce my overall emissions.

Moral to the story? Convenience has a cost, usually in financial terms, but also in environmental terms and even health. Cooking your own meals might be less convenient than eating out, but may be cheaper and healthier. Walking or biking to work may be less convenient than driving, but will be cheaper, healthier, and more environmentally healthy. In typical modern lifestyles, it’s not difficult to find ways to do good, by enduring –nay, by enjoying— just a little bit of inconvenience. So, next time you have a chance to chose inconvenience over convenience, give inconvenience a shot. Your wallet, your body, and your environment will thank you for it.

More thoughts on insulation

I got a lot of great comments on my recent post on insulation, so I thought I’d write another post to summarize some of the common issues that have been pointed out, and to also elaborate on my plan.

Labor

A few readers pointed out the higher labor cost of gathering more firewood. I said in my post that I was ignoring that, but I think it deserves a few more words…

Economists call it opportunity cost. When I was in college, students would queue up at one of the campus coffee shops, which served milkshakes for a dollar on Wednesdays. Obviously, this tradition, knowns as “Shake Day”, was a popular diversion among students who would wait in these long lines with their friends, socializing (or simply pondering silently in solitude) as they waited for their tiny cup of sugary molten goop. An Economics professor once criticized this tradition, by invoking the concept of opportunity cost. The professor argued that the cost of waiting in line outweighed the potential upside of buying a shake for a dollar. Instead, presumably, students should be doing homework to prepare for high salaried careers, or perhaps be peddling their time to low-wage campus jobs for $10/hour.

Of course, this “criticism” wasn’t entirely serious (I hope), but in my eyes, it represented a common perspective in our society that I find troublesome, as it is the very reason we have lots of fat wealthy people who are unhappy and unhealthy. Yes, I can be sitting at a desk, selling my time for $125/hour (or more). But if that’s what I wanted, I wouldn’t be living in the woods. For me, an excuse to get outside, be in the woods, and do a little physical work, is worth far more than what money can buy. More generally, gathering my own fuel makes me more aware of my resource consumption, and having to go out to the woods to gather fuel will also give me better insight into how quickly (or slowly) I am depleting the resources I have, and in turn, get a better assessment of how sustainable (or unsustainable) my lifestyle is.

And yes, it is also entirely possible that I’ll decide at some point that I’d rather spend less time gathering wood. If that’s the case, I’ll change something, but until I try it, I won’t know.

Insulation is for summer too

I focused mostly on how insulation will impact my life in the woods should I stay for the winter, but, of course, insulation matters in the summer too. However, as far as I understand, insulation in the winter and in the summer are actually two different problems.

In the winter, the goal is to keep the cold air outside, from cooling down the interior. Heat is transfered mostly through conduction and convection. That is, the warm air inside heats up the structure’s sufaces, which in turn conduct (and radiate) heat to the outside cold. Or, cold air gets into the structure, displacing warm air. So the common solutions are to use insulation materials that prevent conduction, like foam and batt insulation, and prevent air exchange.

In the summer, the goal is to keep the interior cool, but the main problem isn’t the warm air outside, but rather direct radiant heat from the sun. Up in my area, the air is very dry in the summer, and at 4200ft elevation, the air stays fairly cool most of the time. But the sun beats down relentlessly, heating anything it touches. So the goal is to reflect that heat away from the structure, and to prevent it from heating up the surfaces. To reflect radiant heat, you don’t need thick batt insulation; a coat of white paint, or shiny material like mylar will do the job quite well.

Granted, from what I understand, most homes don’t make a distinction between the different heat transfer characteristics. And indeed, you don’t have to. In the summer, you could let the sun heat up your roof, and then prevent that heat from getting conducted inside by using a ton of batt insulation in the roof and attic. That way, you’re dealing with conduction in the summer and winter, and can use the same insulation for both scenarios. The kind of insulation that works well in the winter can also be beneficial in the summer if you want to make efficient use of air conditioning (which I don’t have), or want to keep the structure from heating up during the day, once it has been cooled at night.

In my particular case, since I am trying to minimize insulation, I plan on trying to reflect sun as much as possible during the summer, instead of relying on insulation. I’m planning on buying light-colored roofing panels, and also lay down a layer of mylar (which I have l left over from Hut 1.0) under the roofing panels to keep the roof from getting too warm in the first place. I won’t be able to expect the structure to be any cooler than the ambient shade temperature, but that’s good enough for me (for now). If I need additional cooling, I might make a swamp cooler, but if this summer was fairly typical, I probably won’t need it for more than a few weeks each summer.

Moisture

Another issue that I didn’t really address is moisture/condensation. I considered using housewrap, but decided instead to seal up the cabin through other means (namely, by taping up seams between the exterior insulation boards, and by using spray foam insulation and caulk). However, that still leaves the issue of moisture, since sealing up the cabin will simply keep moisture from getting out, which in turn could cause condensation and all sorts of other problems.

Wood stoves too hot?

A couple of commenters also pointed out that a wood burning stove might get too hot. I guess this sort of depends on how big/hot of a stove I get, but right now, I’m leaning towards getting an old fashioned cast iron stove from the local antique shop. I have no idea how much heat those things give off, but I could see how it could get kind of warm.

An Idea

So, it seems like I have two open problems: controlling moisture, and keeping the cabin from getting too hot.

Fortunately, there’s a common answer to both problems: ventilation. Pumping fresh dry air in and moist air out solves the condensation problem, and will probably help with the heat problem too. The plan is to have an air intake (possibly with a small 12V fan) near the stove, so that the air that gets sucked in gets heated immediately. The idea is to pump more air into the cabin than the stove needs, and thereby create an over-pressure (this will also prevent cold air from getting in from undesirable gaps). I’ll have a vent at the top of the hut, where hot moist air gets pushed out. Most of this air movement will happen by convection, since the cold fresh air will rise once it gets warmed by the stove.

I should only need to actively vent air when I’m actually producing lots of moisture, for instance, when I’m cooking or drying wet clothes. At night, I’ll probably stop the air exchange to conserve heat, and while I’ll generate some moisture, I could probably dry out the interior again the next morning by getting the stove going and turning on the fans (or by opening the windows if it’s warm enough). If I decide that I need more insulation, I can always fill in the wall cavities, which I plan on leaving open for now. Adding a moisture barrier later won’t be an option, but hey, there’s always Hut 3.0.

Thoughts on insulation

When it comes to insulation, more is better. Or so they say. Of course, I’m always skeptical when people say “more is better.” More may be better in some ways, but there’s always a cost to having more, and it turns out you usually can get away with less. But how much is enough? That is what I want to know.

I’ve been doing some research on insulation, and as it turns out, it’s a rather complicated subject. On the one hand, there’s this deceptively simple formula:

H = ( 1 / R) x A x T
H : heat loss in BTU/hour
R : R-value
A : surface area in square ft
T : temperature difference in Fahrenheit

Using this formula, I can calculate the theoretical heat loss of my cabin. For instance, Hut 2.0 will have a surface area of around 750 square ft, and if I manage to wrap it all up with R-10, and there’s a 50F temperature difference between the interior and exterior, I can expect to lose (1/10) x 750 x 50 = 3750BTU/hour. That doesn’t sound like much. For instance, even a tiny stove designed for boats is rated at 3000 – 8000BTU. In fact, I can even go down to R-5, and will be under 8000BTU/hour.

The reality, of course, isn’t so simple. I just assumed a single R-value for the entire structure, but the reality is that windows will have a much lower R-value, the door another value, and perhaps the walls, floor, roof will all have different values too. On top of that, R-values give you an idea of how slowly heat will transfer through surfaces, but that only accounts for a fraction of actual heat exchange. In a structure, one huge source of heat loss is through air exchange. For ventilation, outside air needs to be brought in, and that necessarily displaces internal air. At the very least, in order to use a stove, I’d need to suck in enough cold air to supply oxygen for the fire (and myself). So the kind of calculation I did above is useful for setting a baseline, that is, I know my heat loss won’t be any less than the calculated figure, but doesn’t produce anywhere near an accurate or realistic number.

On the other hand, I can’t afford to go and buy tons of insulation. Also, the structure is tiny as it is, so to maximize space, I’d like to keep the wall cavities open instead of filling them in with insulation. There’s also the environmental cost too, since most common forms of insulation are made of toxic materials, or at least materials that are non-biodegradable and difficult to recycle. There are “green” insulation options, but as batt or blown insulation materials, and not rigid boards that I can use. I might get away with less insulation if I decrease air exchange by using housewrap, but housewrap is made of plastic, so that’s less than ideal in my opinion. But then, if I really care about green materials, I should probably be building a straw-bale structure, so perhaps there are limits to how green (or warm) of a structure I can build out of timber framing.

My situation is also different to those of typical homes, because I live in the woods and have a practically infinite and renewable source of firewood. For me, firewood is free, so the cost of heating is also free (if I ignore labor, which I do). From an ecological perspective, I have no qualms burning dry dead wood on my property, since if I weren’t burning the fuel, a natural forest fire very well may instead. So while typical houses may be able to justify the financial and ecological cost of additional insulation by factoring in the cost of heating, for me, the cost of insulation is just that: a cost. The only consideration I have, is to make sure that my heat loss doesn’t outstrip my heating option. Though, if that’s all I’m worried about, I think an old fashioned cast iron stove that the local antique store sells for a little over $100 will probably keep my hut warm either way.

So that was a rather long way to say, I’m going to go light on insulation, and instead depend on good heating to stay warm. Stay tuned to find out how that works out come winter (assuming I stick around for winter, which isn’t yet certain).

The Issue of Rain Water Catchment

Hardly a week goes by without someone suggesting that I set up some rain barrels and capture some rain water. I had a similar notion when I first got the land last year, but I’ve since discarded it as being mostly unfeasible. But, since it keeps coming up, I figured I’d write a post describing why it’s probably not worth the trouble, at least for now.

At first glance, capturing rain water seems like a simple and obvious idea, given my lack of any other local water source. The area I’m in gets over 30 inches of precipitation a year, mostly between the months of October and April. During the warmer months, though, it’s generally very dry. This year has been a bit of an exception, with two very heavy days of rain so far already, but the average precipitation for the whole month of August is less than a third of an inch (although, I suspect the median rainfall for the month is more like zero, with exceptions every few years bringing up the mean).

So, what’s wrong with rain water catchment? The main problem is that most of the precipitation comes down during the colder months, and when I say colder months, I mean freezing months. Last year, lows in November were already falling to the low 20s F, and during the winter months, single digit lows are a regular occurrence. Last winter, it apparently got cold enough that a bottle of soda I’d left in the utility trailer had exploded, and some of my 2.5 gallon water containers had also been damaged. So, freezing weather creates, as far as I can foresee, two problems.

The first problem is that whatever container I collect water in has to be able to withstand freezing. The rain catcher I ended up using for my water tower specifically says that it needs to be emptied before frost. Other rain barrels and water tanks might be sturdier, but even if the container can contain freezing water without bursting, there’s still the fact that big chunks of ice could be difficult to work with if I wanted to use that water during the winter. One possible solution would be bury the water containers below the frostline, but that really complicates what should be a simple solution.

The second problem is that much of the precipitation comes down as snow. While rain can be captured off of my hut roof fairly easily, snow might be trickier since it obviously doesn’t flow the way water does. It’ll first accumulate on my roof, compact, maybe even freeze into ice, then eventually slide off in big heavy clumps. These clumps could come off the roof with sufficient force to either tear off the gutters, or fly right over them. I could create a surface with a nice gentle grade where snow can accumulate and stay without falling off as it gradually melts, but that still leaves the aforementioned issue of the water having to be stored somewhere where it won’t freeze.

These problems (and possible solutions) are further complicated by the amount of water I’d need to make the whole solution worthwhile. This summer, my garden used at least 25 gallons of water a week, and I used another 10 or so for drinking and bathing, for a total of about 35 gallons a week. If we say the dry season lasts 6 months (which is being generous), that’s 26 weeks X 35 gallons = 910 gallons. And trying to bury a 1000 gallon tank, even partially, is no easy task. Besides, a tank of that capacity isn’t exactly cheap; rule of thumb is roughly $1 per gallon for a good tank. On top of that, if I need to build a separate water catchment surface other than my roof, I’d need a surface over 80 square ft in area assuming I manage to capture 20 inches of precipitation, which is probably optimistic (the math: 20 inches ~= 50.8cm, which means 5.08 liters per 100 square cm, or 508 liters per square meter, so to get 1000 gallons or 3785 liters, I’d need 3785/508 ~= 7.45 square meters ~= 80 square feet). And that’s just to barely cover my current needs, which are pretty minimal. I guess I don’t have to try and cover all my needs this way, but seeing how little work it currently is for me to haul water from town, I’d want a replacement to be significantly less work to justify the up-front cost.

Of course, compared to digging a well, which could cost me over $10k, a 1000+ gallon water catchment solution could still be cheaper. So I wouldn’t dismiss the idea entirely, but nonetheless, I don’t think it’s quite as simple as most people seem to think it is. Or maybe I’m over-thinking this. Has anyone successfully setup water catchers in similar climates?

Portable two-axis manual solar tracker

Solar tracker in front of my camp at Burning Man

Last year, I took my beloved Engel fridge/freezer with me to Burning Man, but had trouble keeping it powered when my generator died. So this year, I decided to run my camp off of the new 100 Watt solar panel I’ve been using up on my property for a couple of weeks now. While my fridge only uses less than 10 Watts of power, I wanted to try and build a solar tracker to maximize output on my property, and Burning Man seemed like a great place to test such a device.

In order for the tracker to be useful on my property, I needed it to rotate around two axes: one to track the sun during the course of a day, and the other, the elevation, needs to be adjustable since the sun tracks higher or lower in the sky depending on the season. Additionally, in order for me to bring it to Burning Man, it had to be easily transportable, yet also be able to withstand up to 70 mph gusts in the desert.

The general design had been bouncing around in my head for a while now, and is based loosely on a giant tilt maze game I made a while back. To lock things in place, there are two half-disks attached to each of the rotating pieces, which are locked in place using a pin. The whole thing is held together with 1/4″ bolts, and can be assembled or disassembled within minutes by one person. And, as you can see below, it all comes apart into relatively flat pieces for easy transportation. To save weight and bulk, I also used more 2x2s and 1x4s instead of 2x4s, and I mostly used scrap wood I found lying about. At Burning Man, I put my AGM battery, which weighs about 60lb, on one of the legs, and when particularly strong winds were forecasted, I put one of my water cubes (also 50lb+) on one of the other legs. I had the tracker oriented south, and moved it roughly 3 times a day to catch the morning rays from the east, mid day sun from above, and afternoon light from the west.

All in all, it worked very nicely, and I’m happy to report that it fulfilled my requirements perfectly.